图床
图床同样可以使用github只需要上传图片到仓库,然后通过https://raw.githubusercontent.com/xfx98/仓库名/分支名/文件路径名
的方式访问图片如https://raw.githubusercontent.com/xfx98/ms/master/img/typora-icon.png
就是我仓库的图片。 通过Typora配置图片上传来编辑md文件能够实现类似博客系统的自动上传,
通过安装 PicGO 就可以。
然后配置github图床,这里需要配置成自己仓库,没有token是无法进行各种操作的。 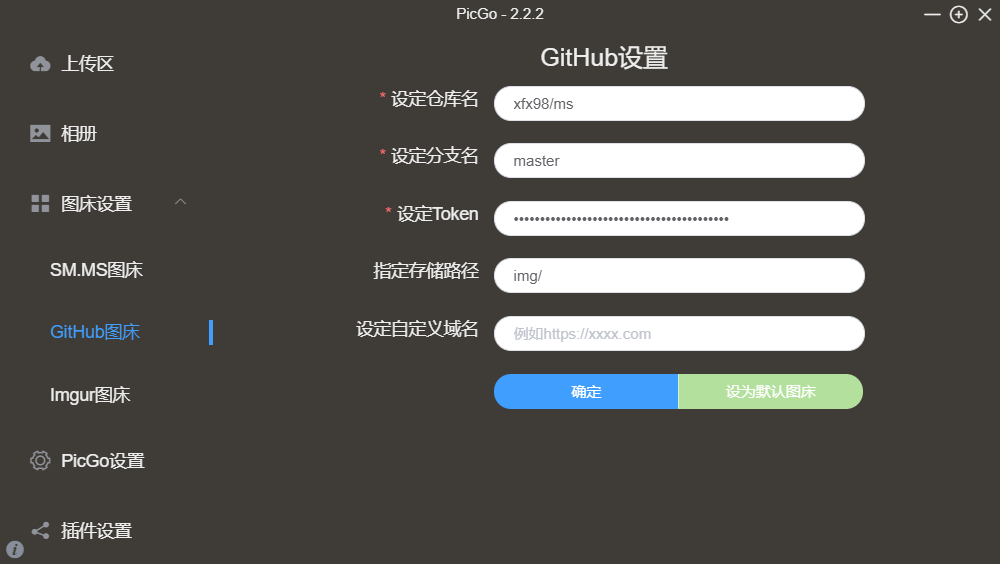
获取token,访问:https://github.com/settings/tokens 或在github里点击setting,进入 Developer
settings点击Generate new token给上全部权限或者自己选择相应的写入读取权限就可以了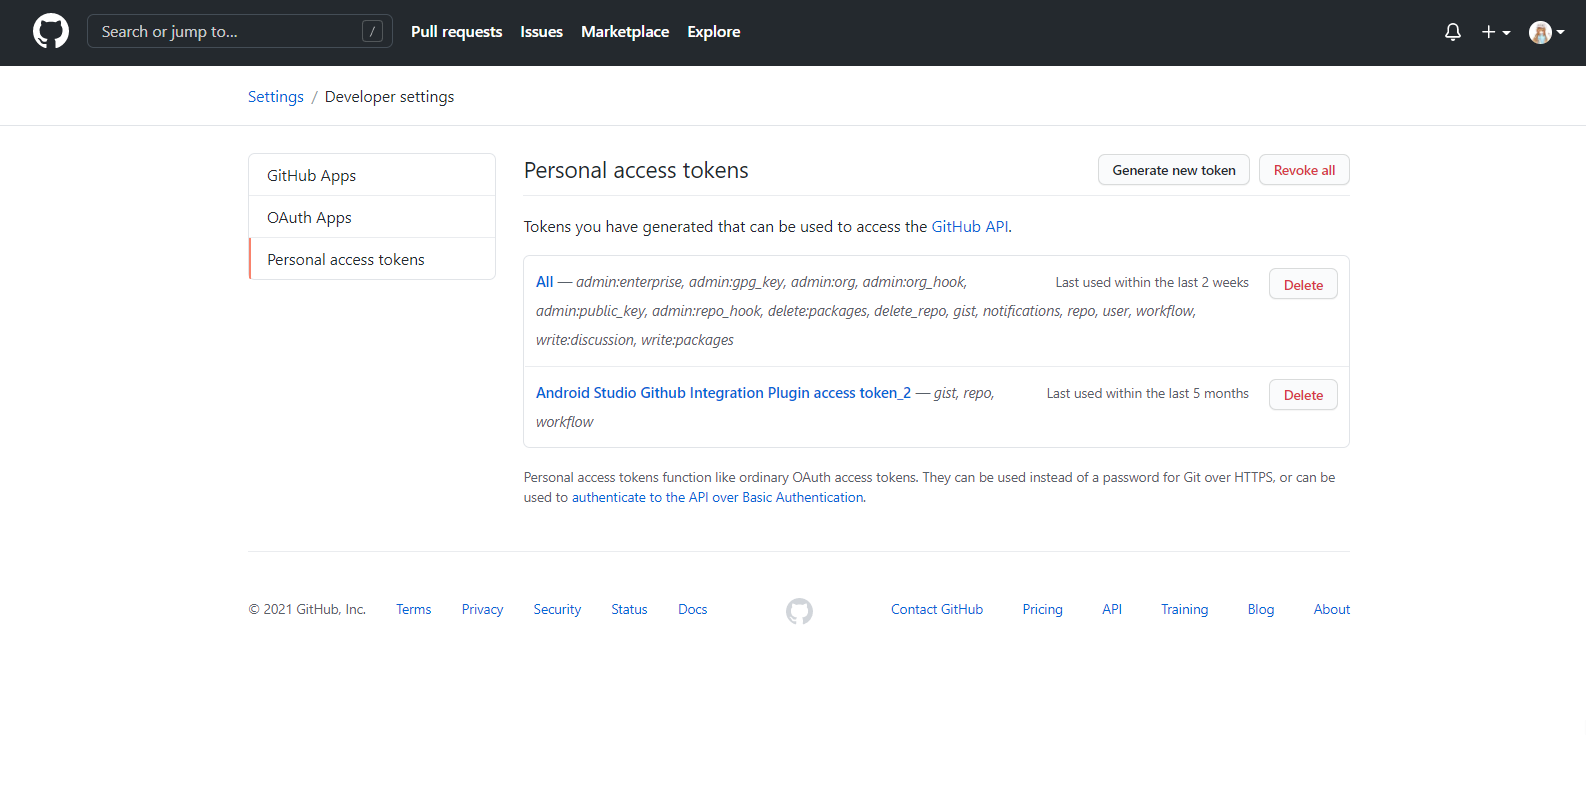
一、配置GitHub
注册GitHub 注册GitHub,并登陆 github.com
username将要用到,先记住创建仓库 点击
Create a new repository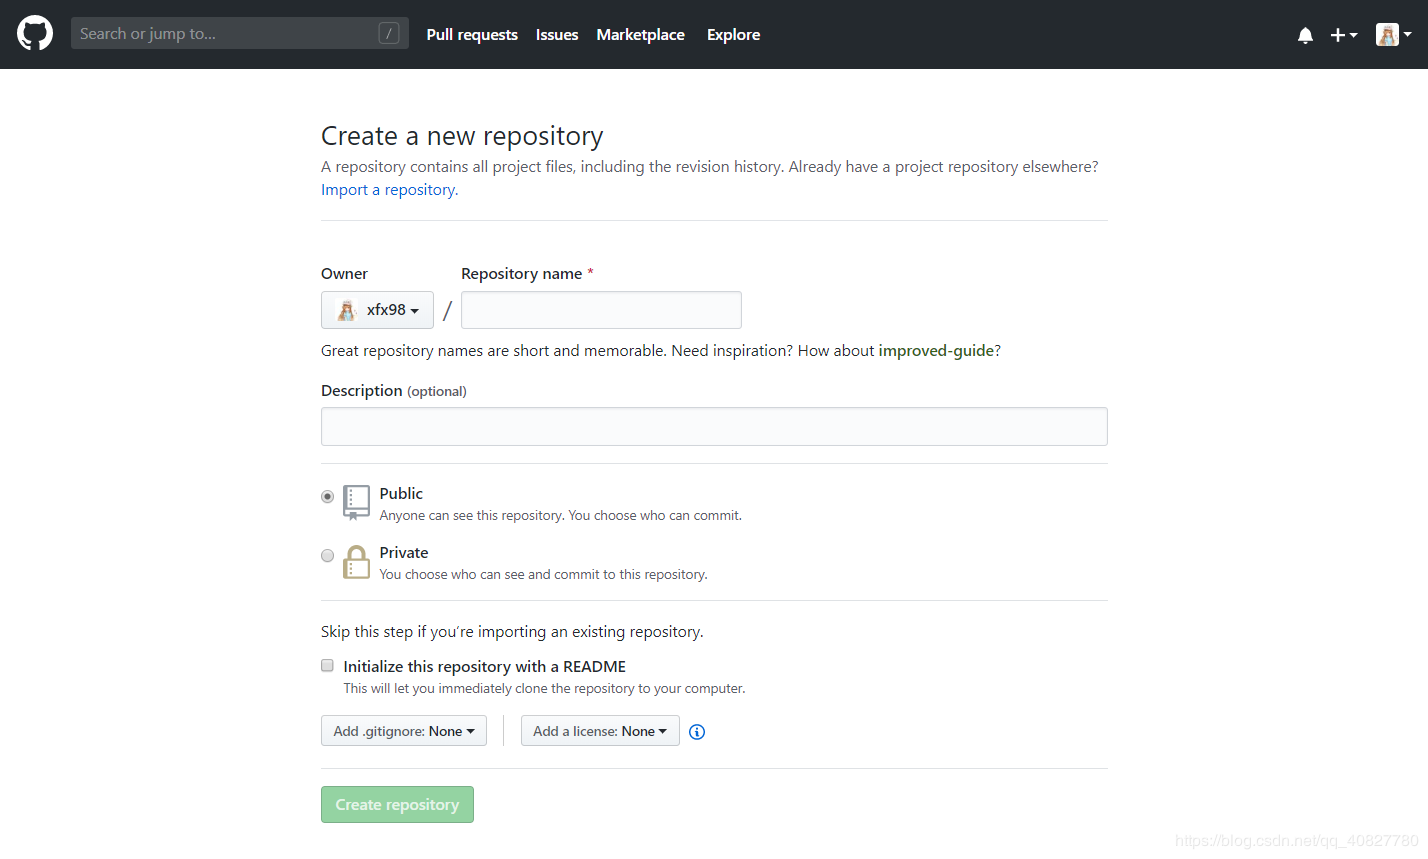
reposository name填写username.github.io这个是固定的,usename是注册时的用户名,否则则无法以username.github.io访问博客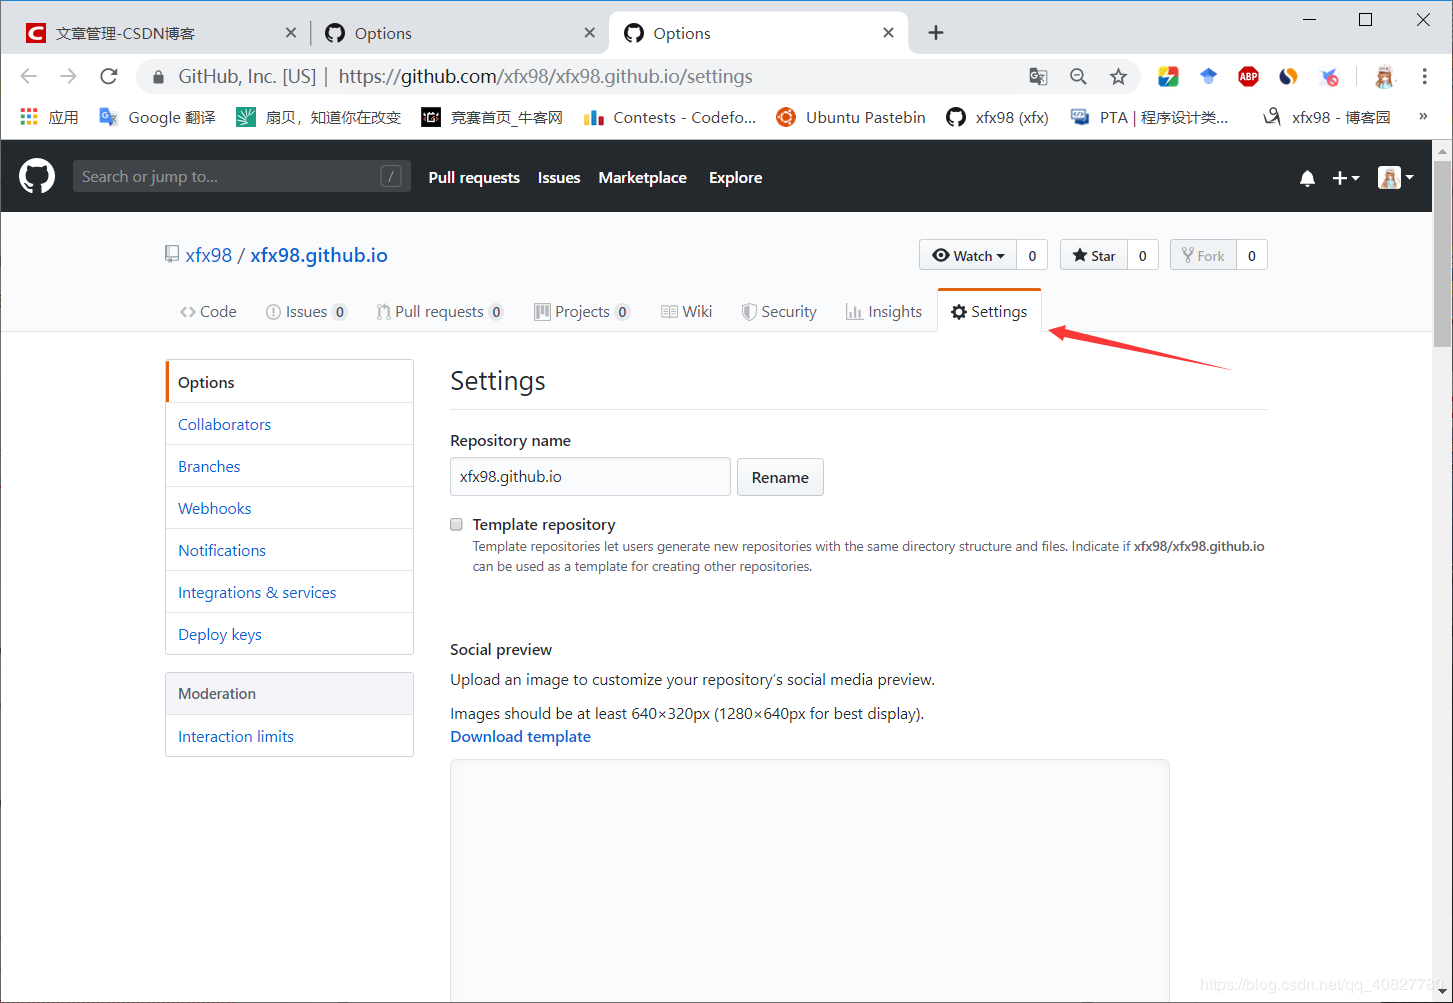
设置仓库 进入到设置页面找到
GitHubpage选项,选择master branch,然后任意选择一个主题,确认修改即可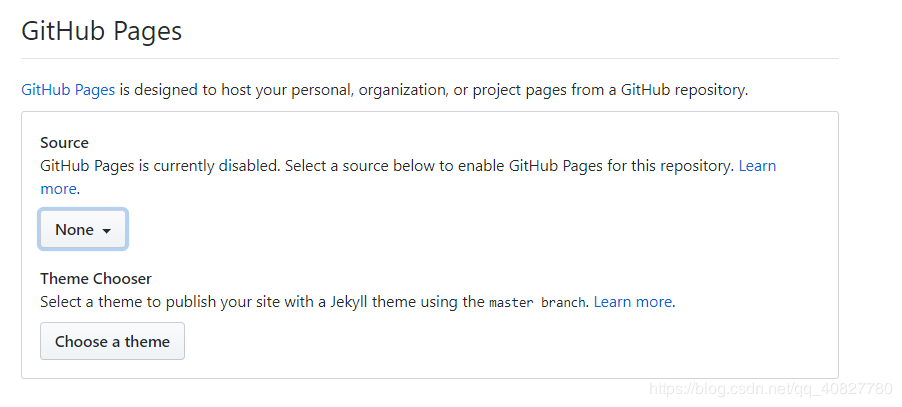
CND加速
使用链接
例如
https://cdn.jsdelivr.net/gh/xfx98/live2d-widget@latest/autoload.js
二、环境安装(node.js Git)
安装 Node.js 安装Node 作用:用来生成静态页面的 到Node.js官网下载相应平台的最新版本,一路安装即可。 cmd下执行
node -v查看是否执行成功安装Git 作用:把本地的hexo内容提交到github上去. 下载安装 Git 。
安装Hexo 执行如下命令安装Hexo
npm install -g hexo
执行hexo -v查看版本信息,看是否安装成功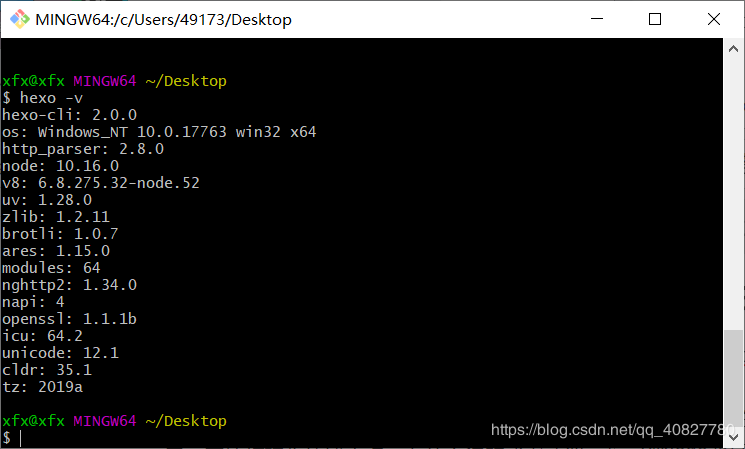
执行init命令初始化hexo,命令:hexo init
至此,全部安装工作已经完成!blog就是你的博客根目录,所有的操作都在里面进行。 生成静态页面hexo g
本地启动启动本地服务,进行文章预览调试,命令:hexo s也可修改端口改为执行命令hexo s -p portnum将portnum替换为自己想要的端口就行了。 浏览器输入http://localhost:4000
就能看到hexo的初始页面啦。
三、配置博客
将以下三个选项配置好信息配置好 将username全部改为注册时的username,其它的可以做自定义修改
# Hexo Configuration
## Docs: https://hexo.io/docs/configuration.html
## Source: https://github.com/hexojs/hexo/
# Site
title: xfx's blog #网页标题
subtitle: xfx's blog #网页副标题
description: All that exists is what's ahead. #网页描述
keywords:
author: xfx
language: zh-CN
timezone: Asia/Shanghai #时区
# URL
## If your site is put in a subdirectory, set url as 'http://yoursite.com/child' and root as '/child/'
url: http://username.github.io #网页网址
root: /
permalink: :year/:month/:day/:title/
permalink_defaults:
deploy:
  type: git
  repo: https://github.com/username/username.github.io.git #GitHub仓库
  branch: master
这里安装git部署工具执行install -- save hexo-deployer-git
第一次提交会要求设置邮箱和用户名,设置自己注册的就行了,之后还会提示要求输入用户密码,按要求输入。
  git config --global user.email "you@example.com"
  git config --global user.name "Your Name"
然后执行hexo g hexo d 等待结束便可以通过username.github.io访问博客了。
四、设置皮肤
这里有我的博客的一款皮肤示例 xfx98.github.io
如果看中可以直接带走,hexo-theme-matery
(虽然我将它搬到自己博客上了,做了自定义修改。然后尊重版权,大家还是看原作者的吧2333) 页面有中文文档,和详细的配置,还有一些插件的安装,这里就不赘述了。 还有一个比较经典的next主题安装(以下命令在博客根目录下执行)
将next主题下载到本地执行命令
git clone https://github.com/iissnan/hexo-theme-next themes/next启用next主题,修改
_config.yml配置项theme为next
# Extensions
## Plugins: https://hexo.io/plugins/
## Themes: https://hexo.io/themes/
theme: next
- 执行
hexo s访问http://localhost:4040查看是否使用成功
然后就是一些主题的配置啦,next有三种主题,可以选择自己喜欢的一种。
一些常用命令
hexo new"postName" #新建文章hexo new page"pageName" #新建页面hexo g #生成静态页面至public目录hexo s #开启预览访问端口(默认端口4000,’ctrl + c’关闭server)hexo d #将.deploy目录部署到GitHubhexo version #查看Hexo的版本